Chain Link Fence Installation: Step-by-Step Timeline and What to Expect On-Site
If your old fence is leaning, rotted, or storm-damaged, you want the swap done fast and done right. This guide walks through chain link fence installation and the timeline for each stage, the way a professional crew in Greater Cleveland actually does it, step by step, with a realistic timeline for each stage. Whether you are replacing a fence that failed or enclosing a bare new-build yard for the first time, knowing what happens on-site helps you judge quotes, ask better questions, and spot a crew that is cutting corners.
Here is the short version: most residential jobs take one to three working days on-site, plus lead time before the crew ever shows up. The steps below cover both, in order.
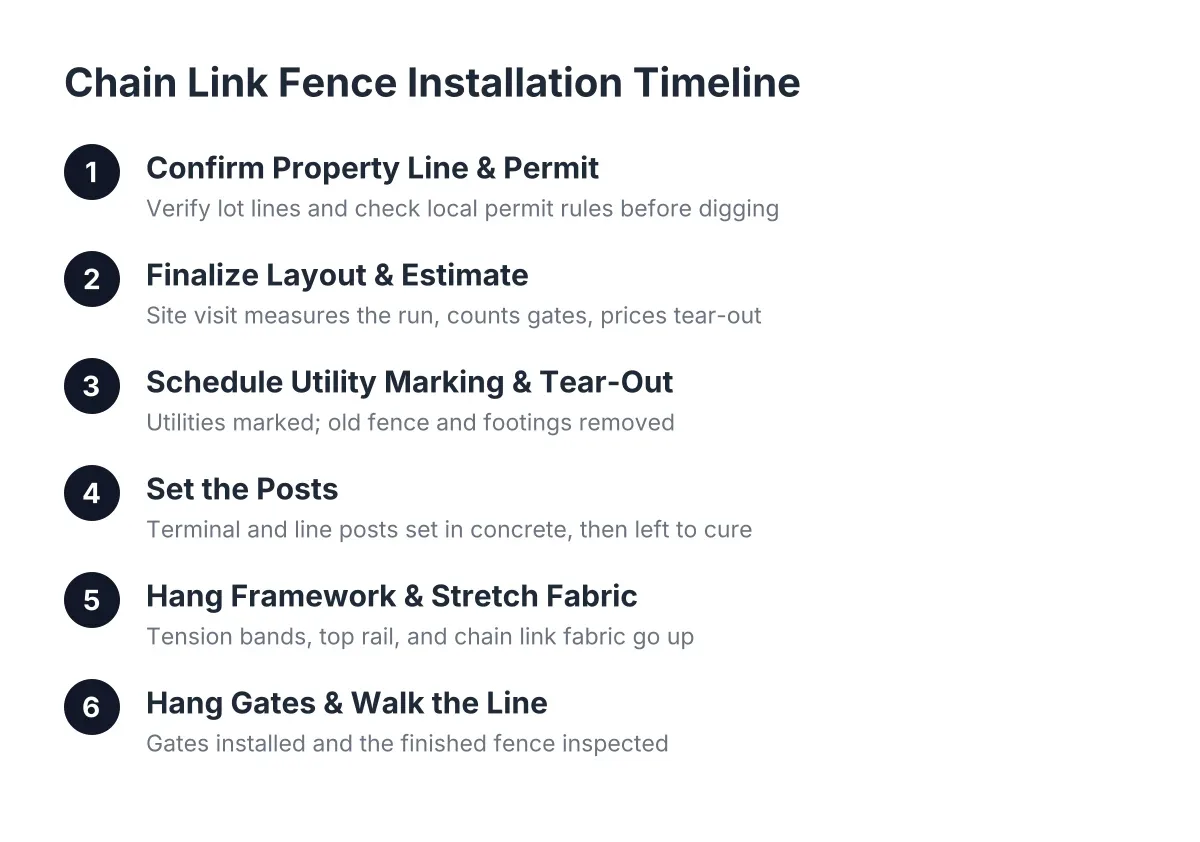
Step 1: Confirm the Property Line and the Permit Question
Before anyone digs, confirm where your property actually ends. Cleveland's older inner-ring neighborhoods have tight lot lines, and a fence set even a foot onto a neighbor's property can turn into an expensive do-over. Pull your plat map, find your survey pins, or order a new survey if the pins are gone.
Next, deal with the permit. Many Cleveland-area municipalities require a fence permit for new installs, and rules vary for a replacement where the footprint does not change. Do not assume a like-for-like fence replacement is exempt. Call your local building department and ask directly; permit requirements, fees, and timelines differ by suburb, so verify with your own city rather than relying on what a neighbor did.
Expect this stage to take a few days to a couple of weeks, depending on how fast your city processes permits. A good fence company will tell you up front whether your job likely needs one and who typically pulls it.
Step 2: Get the Layout and Estimate Nailed Down
A solid estimate starts with a site visit. The estimator measures the full run, counts gates, notes slopes, and flags obstacles like tree roots, old concrete footings, or a neighbor's existing fence you will butt against. For a replacement job, this is also when tear-out and haul-away of the old fence gets priced, so ask that it appears as a line item.
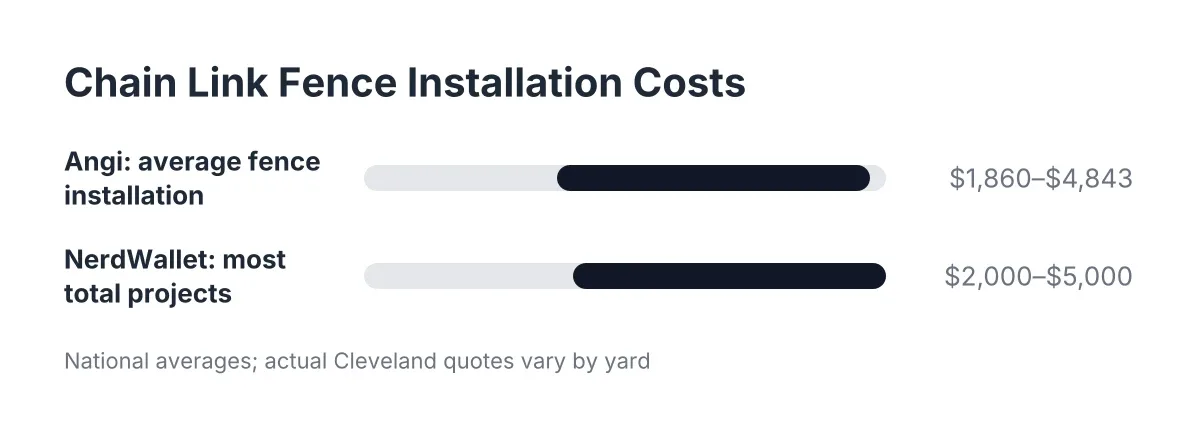
For budgeting context, Angi reports that fence installation costs an average of $3,277, with most homeowners paying between $1,860 and $4,843. NerdWallet reports professionally installed fences cost $15 to $25 per linear foot on average, citing Angi data. Chain link usually lands on the lower end of material costs, which is a big reason pet owners, new-build buyers, and landlords choose it.
In addition, ask the estimator these questions before you sign:
- Is old fence removal and disposal included in the price?
- Who calls for utility line marking, you or the crew?
- How deep do posts get set, and are they set in concrete?
- What gauge is the fabric, and what is the pipe diameter for posts and top rail?
- Who pulls the fence permit if one is required?
One caution on price shopping: the cheapest bid often costs more over time. A fence with shallow posts or thin-wall pipe fails sooner in Cleveland's freeze-thaw ground, and rebuilding it costs more than paying for proper work once.
Step 3: Schedule Utility Marking and Tear-Out
No crew should dig before underground utilities are marked. In Ohio, that means a call to the state utility protection service a few business days before digging. The colored flags and paint that show up in your yard are normal; leave them in place until the posts are set.
If you are replacing a failed fence, tear-out usually happens the morning of day one, or as a separate short visit. Say a storm dropped a limb across two sections of your old chain link fence and half the line posts wobble in rotted concrete. In that scenario, a typical crew cuts the fabric free, unbolts the framework, breaks out or pulls the old footings, and hauls everything away in a few hours. Pulling old concrete footings matters; new posts set next to abandoned footings are a common shortcut that leads to crooked lines.
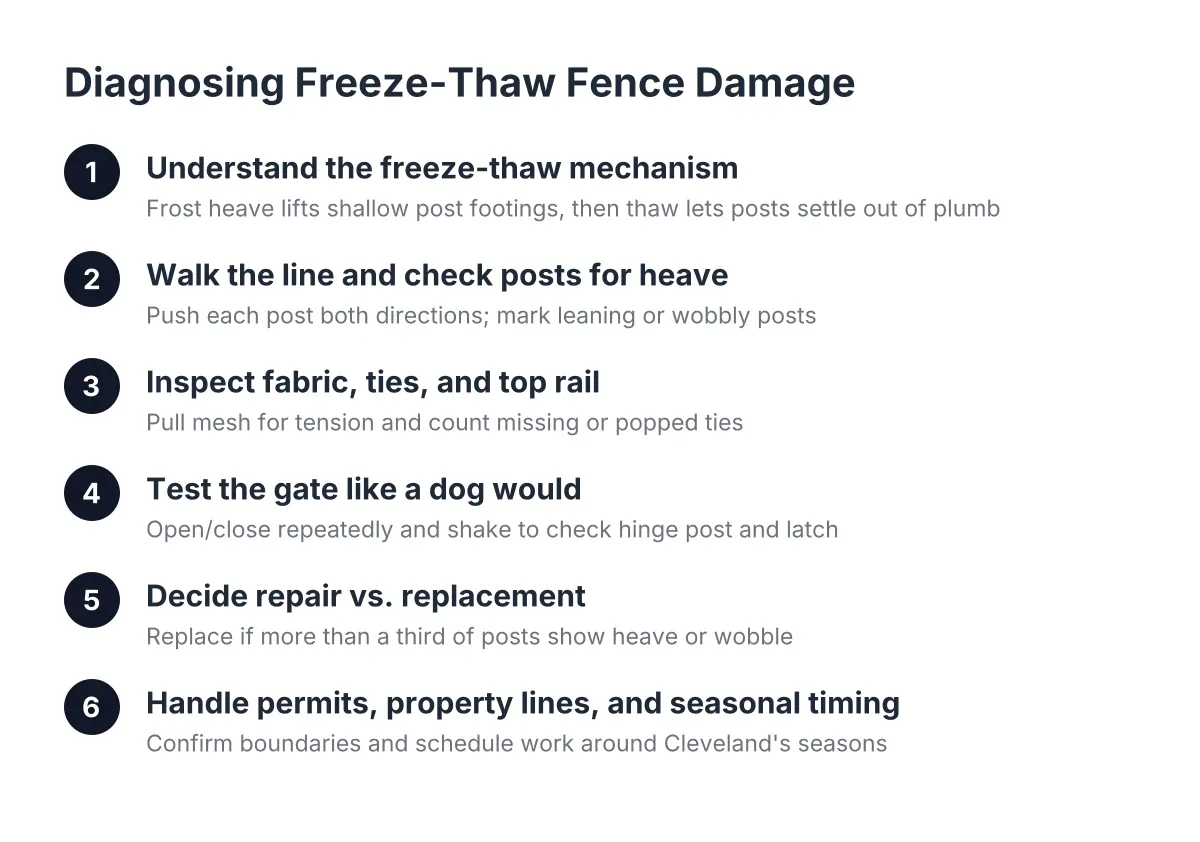
For context on the repair-versus-replace question, HomeAdvisor reports fence repair averages $618. If only one or two posts failed and the fabric is sound, fence repair can make sense. If most posts are loose or the framework is bent, replacement is usually the honest answer, and a straightforward contractor should explain which situation you have and why.
Step 4: Set the Posts, the Make-or-Break Day of Chain Link Fence Installation
Post setting is day one of the actual build, and it is the step that decides whether your fence stands straight in ten years. The crew sets the terminal posts first, meaning the corner, end, and gate posts. Then they stretch a string line between them and set the line posts along that string so the run stays dead straight. A fence laid out by eye instead of a string line shows every wobble once the fabric goes on.
Each post hole gets dug below the local frost line, which matters in Cleveland because freeze-thaw ground movement heaves shallow footings and tilts posts over a few winters. Posts are plumbed, set in concrete, and checked for consistent height. Gate posts often get larger-diameter pipe and bigger footings because they carry hinge load.
Then the concrete cures. Most crews leave the posts overnight at minimum, sometimes a full day or two in cold or wet weather. This pause is not stalling. Stretching fence fabric against green concrete loosens the posts before the fence is even finished. If a crew sets posts and hangs fabric the same afternoon, ask why.
Step 5: Hang the Framework and Stretch the Fabric
Day two is when the project starts looking like a fence. The crew installs tension bands and caps on the terminal posts, runs the top rail through the line post caps, and cuts rail to length where runs end. With the skeleton up, they unroll the chain link fabric along the line.
Stretching is the skilled part. The fabric gets attached to one terminal post with a tension bar, then pulled tight with a fence stretcher or come-along until the mesh has the right rigidity, then secured at the far end. Fabric stretched too loose sags within a season; stretched correctly, it should flex slightly and spring back.
After the stretch, the crew ties the fabric to the top rail and line posts with fence ties. Ties come in different lengths matched to the pipe diameter, so the right hardware matters even at this small scale. On a standard residential run, framework and stretching takes most of a day. Sloped yards, lots of corners, or long runs can push it longer.
Step 6: Hang the Gates and Walk the Line
Gate installation comes last. The crew mounts hinges on the gate posts, hangs each gate, and adjusts it until it swings clear and latches without lifting or dragging. If you are containing a dog or keeping toddlers in the yard, test the latch height and action yourself before the crew leaves. Ask for a self-closing or lockable latch if that is the goal.
The final walk-through should cover the full line. Check that posts are plumb, the top rail runs level or follows the grade evenly, the fabric is tight with no bulges at the bottom, and all tie wires are crimped flat so nothing snags a kid or a pet. Confirm the crew hauled away all scrap, old fencing, and excess concrete. If a permit was pulled, ask whether your city requires a final inspection and who schedules it.
What the Fence Installation Timeline Looks Like for Your Project
A standard residential chain link job in Greater Cleveland typically breaks down like this:
- Permit and property-line prep: a few days to two weeks, depending on your city
- Utility marking: a few business days before digging
- Tear-out of an old fence: half a day to a full day
- Post setting: one day
- Concrete cure: overnight to two days
- Framework, fabric, and gates: one day
- Total on-site time: usually one to three working days
Weather is the wildcard. Frozen ground, heavy rain, and saturated soil all slow digging and concrete cure, so winter and early spring installs often carry longer gaps between post day and fabric day. If you are racing a season, an HOA notice, or a new puppy, build that slack into your plan.
When to Hand It to a Pro Instead of DIY
Plenty of DIY guides make chain link look like a weekend job, and on a flat, open lot with no old fence, a handy homeowner can pull it off. However, replacement jobs are a different animal. Breaking out old footings, working tight lot lines in older Cleveland neighborhoods, setting posts below frost depth, and getting a clean stretch on sloped ground are where experienced chain link fence installers earn their fee. If your project involves a disputed property line, a shared fence with a neighbor, or an inspection flag from a home sale, bring in a professional and your local building department before you commit to anything.
The pattern to remember is simple. Most of the timeline is prep you control, the permit, the survey, the utility call. The on-site work moves fast once posts are in the ground and cured. Understanding the fence installation timeline—which steps take the longest and which depend on weather or permitting—helps you know the steps, ask the questions in Step 2, and keeps the whole job predictable from tear-out to final latch check.
Prefer to talk it through? Call (216) 465-0485 — a quick call is usually the fastest way to get a straight answer for your situation.